Indulgent Lemon Cream Pie That Melts in Your Mouth Recipe
Introduction
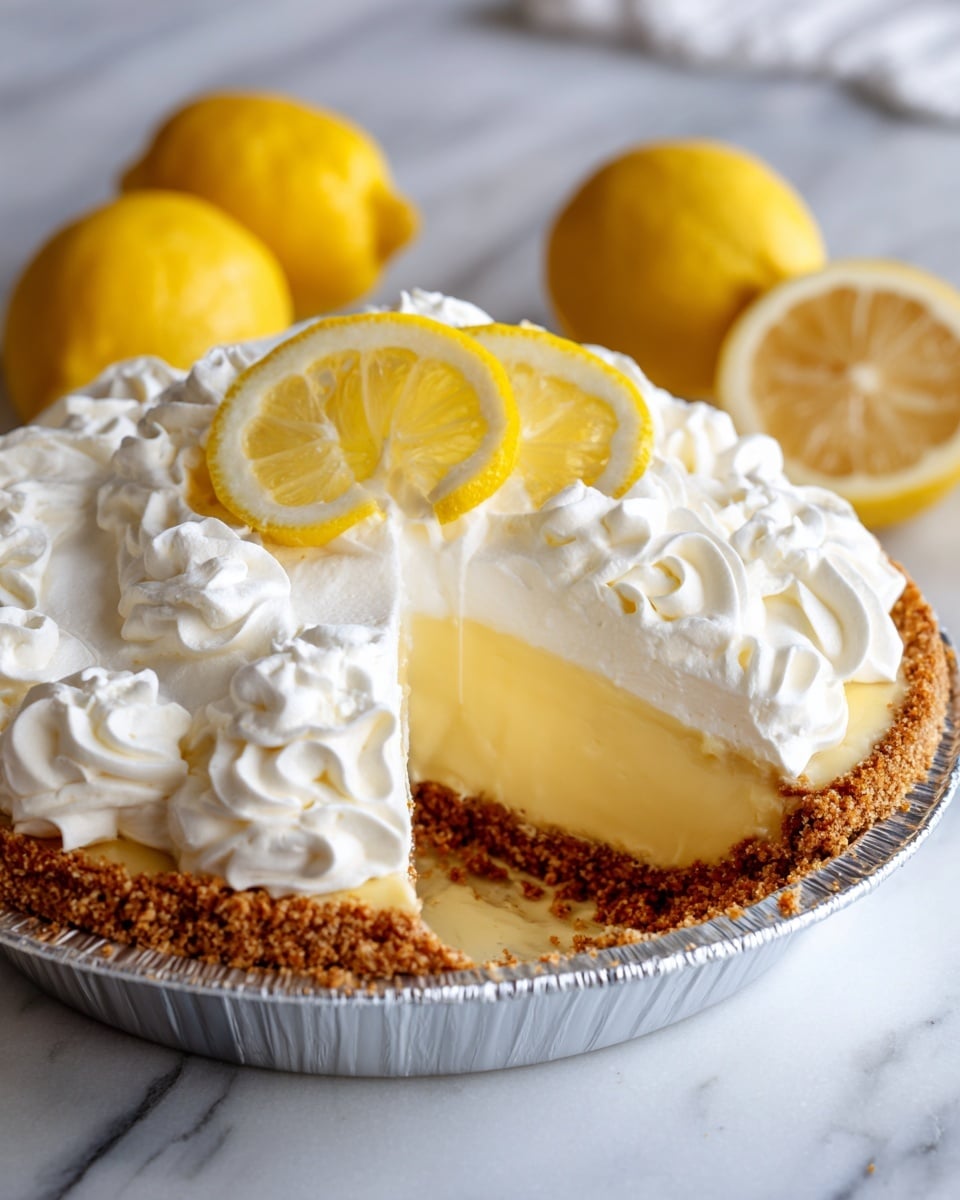
This indulgent Lemon Cream Pie is a perfect balance of tangy citrus and creamy sweetness. With a crisp, buttery crust and a light, luscious filling, it melts in your mouth and delights with every bite.
Ingredients
- 60 pieces Nilla Wafers
- 1/3 cup butter, melted
- 1/4 cup sugar
- 1 1/4 cups heavy cream
- 12 ounces cream cheese, softened
- 14 ounces sweetened condensed milk
- 1/4 cup lemon juice
- 2 tablespoons lemon zest
- 1/2 cup powdered sugar
- 1 cup heavy cream
Instructions
- Step 1: Preheat your oven to 375°F (190°C). Crush the Nilla Wafers into fine crumbs using a food processor or place them in a zip-top bag and crush with a rolling pin. Mix the crumbs with melted butter and sugar until well combined.
- Step 2: Press the wafer mixture firmly into the bottom and up the sides of a 9-inch pie pan. Bake for 6-8 minutes until the crust is golden and fragrant. Remove from the oven and let it cool, then refrigerate for at least 1 hour.
- Step 3: In a mixing bowl, beat 1 1/4 cups heavy cream with an electric mixer until stiff peaks form (about 4-5 minutes on medium speed).
- Step 4: In another bowl, combine softened cream cheese, sweetened condensed milk, lemon juice, and lemon zest. Beat until smooth and creamy. Gently fold the whipped cream into this mixture, taking care not to deflate it.
- Step 5: Pour the lemon cream filling into the chilled crust and spread evenly with a spatula, ensuring it reaches the edges. Refrigerate the pie while you prepare the topping.
- Step 6: In a clean bowl, whip the remaining heavy cream until soft peaks form. Gradually add powdered sugar and continue whipping until stiff peaks form (about 3-4 minutes).
- Step 7: Spread or pipe the whipped cream topping over the filled pie gently. Refrigerate the pie for at least 1 hour before serving.
- Step 8: Slice and enjoy the smooth, creamy lemon dessert with its crisp crust.
Tips & Variations
- For a different crust flavor, substitute Nilla Wafers with graham crackers.
- Use margarine instead of butter for a dairy-free crust alternative.
- For a vegan version, try using dairy-free cream cheese and whipped topping substitutes.
- Fresh lemon juice and zest enhance the brightness of the pie, so avoid bottled lemon juice if possible.
- Handle the whipped cream gently when folding and spreading to maintain its light texture.
Storage
Store the Lemon Cream Pie covered in the refrigerator for up to 3 days. Keep it chilled to maintain the filling’s texture. When ready to serve again, slice directly from the fridge—no reheating needed.
How to Serve

Serve this delicious recipe with your favorite sides.
FAQs
Can I make this pie ahead of time?
Yes, this pie can be assembled a day in advance and kept refrigerated to allow flavors to meld and the filling to set perfectly.
Can I use bottled lemon juice instead of fresh lemon juice?
While fresh lemon juice is preferred for its bright flavor, bottled lemon juice can be used if needed. Just note that the flavor might be less vibrant.
Print
Indulgent Lemon Cream Pie That Melts in Your Mouth Recipe
- Total Time: 1 hour 38 minutes
- Yield: 8 servings 1x
Description
This Indulgent Lemon Cream Pie combines a crispy Nilla Wafer crust with a rich, tangy lemon cream filling and a light, fluffy whipped cream topping. The pie melts in your mouth with its perfect balance of sweet and citrus flavors, making it an irresistible dessert for any occasion.
Ingredients
Crust
- 60 pieces Nilla Wafers
- 1/3 cup butter, melted
- 1/4 cup sugar
Filling
- 1 1/4 cups heavy cream
- 12 ounces cream cheese, softened
- 14 ounces sweetened condensed milk
- 1/4 cup lemon juice
- 2 tablespoons lemon zest
Topping
- 1 cup heavy cream
- 1/2 cup powdered sugar
Instructions
- Prepare the Crust: Preheat your oven to 375°F (190°C). Crush 60 Nilla Wafers into fine crumbs using a food processor or a zip-top bag. In a mixing bowl, combine the wafer crumbs with 1/3 cup melted butter and 1/4 cup sugar, mixing well. Press the mixture firmly into the bottom and up the sides of a 9-inch pie pan. Bake for 6-8 minutes until slightly golden and fragrant. Remove the crust from the oven and allow it to cool completely before refrigerating for at least 1 hour to set.
- Make the Filling: In a bowl, whip 1 1/4 cups of heavy cream using an electric mixer on medium speed until stiff peaks form, about 4-5 minutes. In a separate bowl, beat together 12 ounces softened cream cheese, 14 ounces sweetened condensed milk, 1/4 cup lemon juice, and 2 tablespoons lemon zest until smooth and creamy. Gently fold the whipped cream into the cream cheese mixture, taking care not to deflate the airiness.
- Assemble the Pie: Pour the lemon cream filling into the chilled crust, spreading it evenly with a spatula to reach the edges for an attractive finish. Return the pie to the refrigerator to keep chilled while preparing the topping.
- Prepare the Topping: In a clean bowl, whip the remaining 1 cup heavy cream until soft peaks form. Gradually add 1/2 cup powdered sugar while continuing to whip until stiff peaks develop, about 3-4 minutes. This whipped topping can be piped or spread over the lemon filling using a spatula.
- Chill and Serve: Refrigerate the finished Lemon Cream Pie for at least 1 hour to allow flavors to meld and the pie to set properly. When ready to serve, cut into 8 slices and enjoy the creamy, tangy, and crisp-textured dessert.
Notes
- You can substitute the Nilla Wafers with graham crackers for a different but equally delicious crust flavor.
- For a dairy-free alternative, use margarine instead of butter and dairy-free cream cheese in the filling.
- Fresh lemon juice and zest are recommended for the brightest citrus flavor.
- The whipped cream topping can be sweetened with a sugar substitute to lower calories if preferred.
- Ensure the crust is fully cooled and chilled before adding the filling to prevent sogginess.
- Prep Time: 30 minutes
- Cook Time: 8 minutes
- Category: Dessert
- Method: Baking
- Cuisine: American
Keywords: lemon cream pie, lemon dessert, creamy pie, Nilla Wafer crust, whipped cream topping, easy pie recipe, no-bake filling