
No-Knead Focaccia Recipe
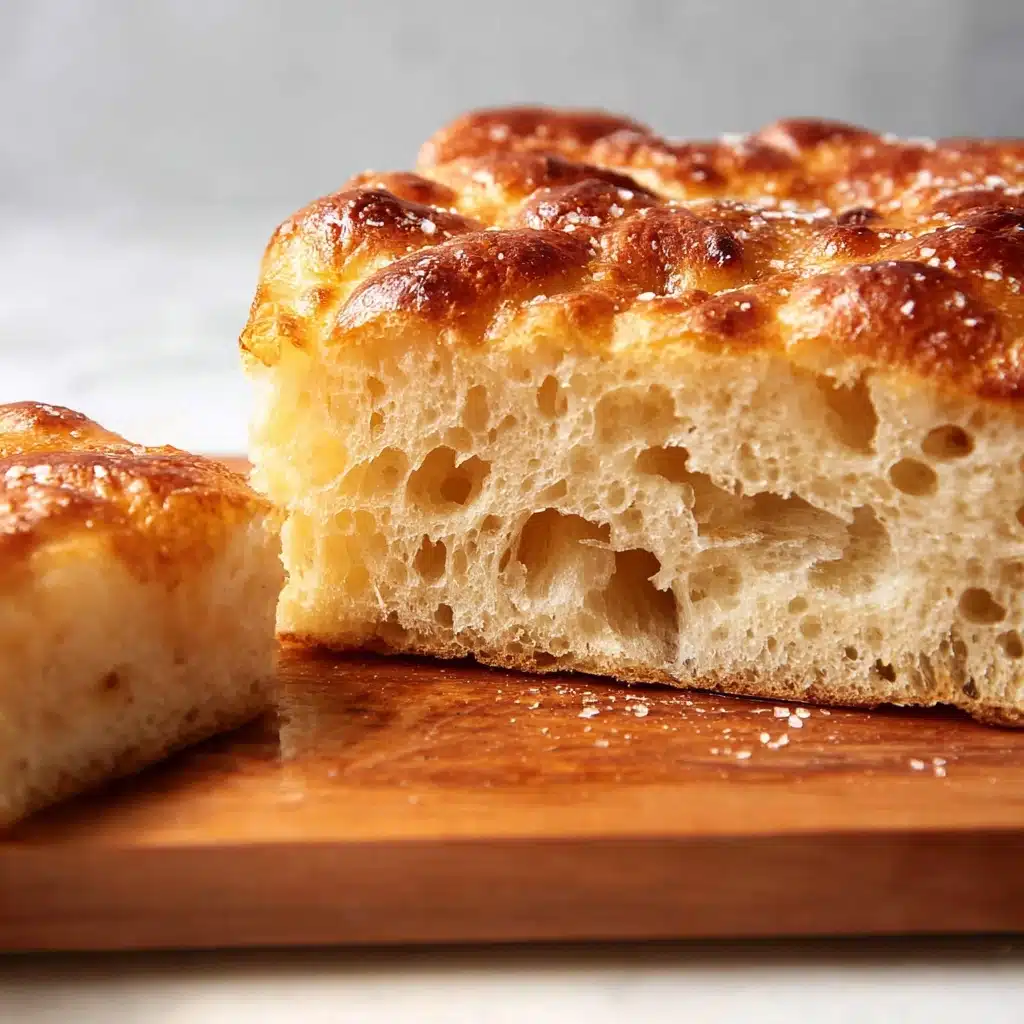
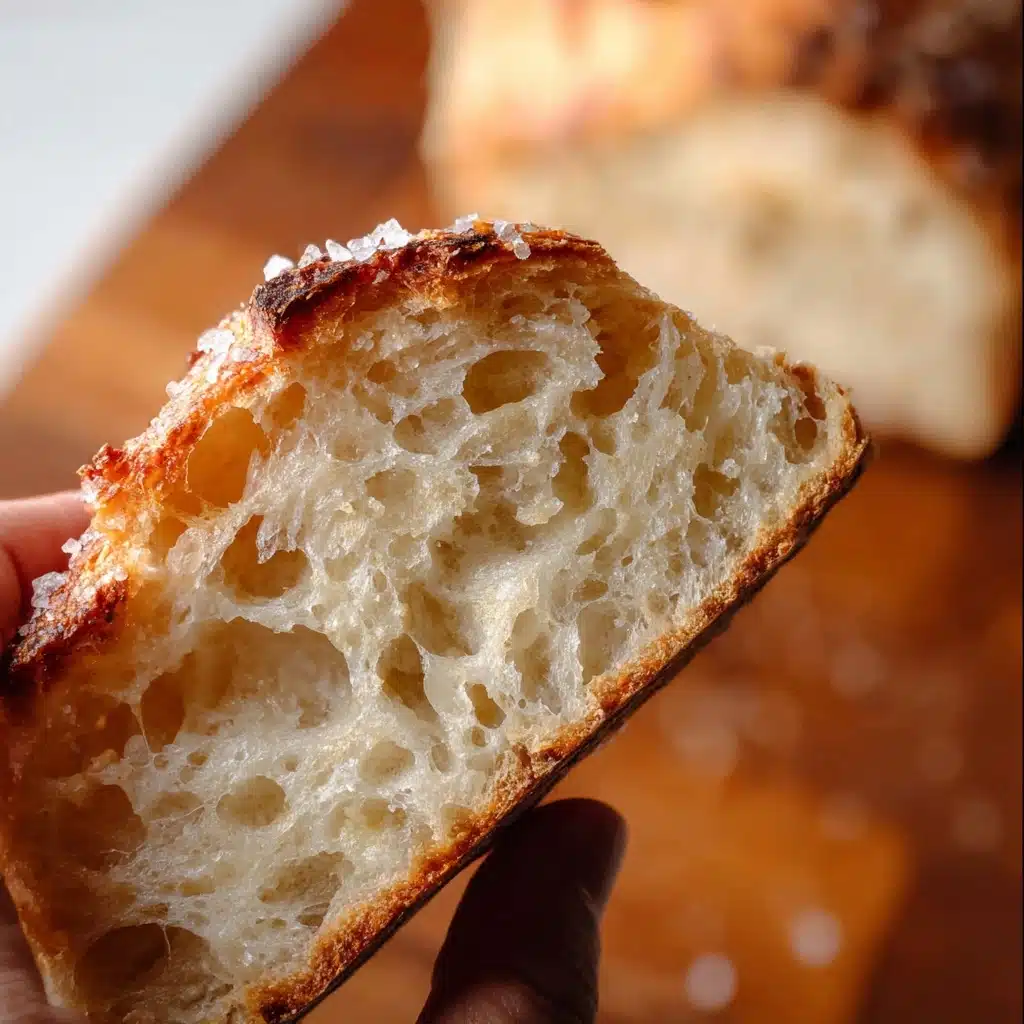
If you’ve ever wanted to bake a bakery-style bread at home without the hassle of intense kneading, then this No-Knead Focaccia recipe is your new best friend. It’s a delightfully simple, yet irresistibly fluffy and flavorful Italian bread that combines a tender crumb with a crisp, golden crust. With minimal effort and everyday ingredients, you can create a focaccia that boasts those signature dimples and a perfect olive oil aroma that fills your kitchen and heart alike. Whether you’re a seasoned baker or a curious newbie, the No-Knead Focaccia unlocks the joy of homemade bread with ease and delicious results.
Ingredients You’ll Need
This recipe calls for a handful of straightforward ingredients that are easy to find but carefully chosen to give this No-Knead Focaccia its incredible texture, taste, and rustic appearance. Each element plays a crucial role, from the sea salt enhancing flavor and crunch to the olive oil that lends a luscious richness and golden color.
- 500 ml warm water: Perfect temperature to awaken the yeast and create a velvety dough.
- 1 Tablespoon sugar: Feeds the yeast for a lively rise and adds subtle sweetness.
- 1 Tablespoon sea salt NOT table salt: Provides bold, natural flavor and crunchy bursts throughout the bread.
- 2 teaspoons instant dry yeast: The magic agent for fermentation that makes your dough rise without fuss.
- 1 Tablespoon olive oil: Adds richness, promotes a crispy crust, and gives the focaccia that classic Mediterranean aroma.
- 550 grams bread flour: Offers strong gluten development for the chewy yet tender crumb anyone will adore.
How to Make No-Knead Focaccia
Step 1: Mixing the Dough
Begin by combining all ingredients except the flour in a large mixing bowl and whisking them together—this step is all about bringing the yeast and salt together with sugar and warm water to activate the yeast gently. Next, add the bread flour and mix until a wet, sticky, shaggy dough forms. This is the only real work you’ll do! Cover the bowl with a tea towel and let the dough rest for 10 minutes to start developing flavor and gluten.
Step 2: Stretch and Fold
Wet your hands to prevent sticking and perform the stretch and fold method. Picture the dough like a clock face; stretch and fold the dough over itself at 12, 3, 6, and 9 o’clock. This gentle technique strengthens the dough without kneading. After covering for 10 minutes, use the coil method by loosening dough from the bowl edges and lifting it with your fingertips so it folds under its weight. Rotate and repeat several times to build that perfect texture while maintaining its wet, tender quality.
Step 3: Bulk Fermentation
Oil the bowl generously, both the dough and inside surface, with about 3 tablespoons of olive oil to prevent sticking. Cover the dough with plastic wrap and a tea towel, then let it rise at room temperature for 1 to 1 ½ hours or refrigerate for 4 to 12 hours to develop complex flavors and a strong gluten network. This slow rise is the secret to a focaccia bursting with layered aromas and the ideal airy crumb.
Step 4: Shaping and Proofing
After fermentation, remove the cover and gently move the bowl back and forth to open the dough’s bubbles and breathe life back into it. Drizzle a 9″x13″ inch baking pan with olive oil, then carefully transfer the dough into it. Fold it into thirds and flip so the smooth side is on top, gently coaxing it toward the edges without forcing it. Cover once more with plastic wrap and let it proof for at least an hour at room temperature, enabling the dough to relax, stretch, and rise beautifully within the pan.
Step 5: Dimpling and Baking
Preheat your oven to 450°F / 232°C. When ready, remove the plastic wrap and drizzle a generous amount of olive oil over the top. With well-oiled fingertips, press into the dough to create those iconic dimples—this not only produces the characteristic look but also traps the lovely olive oil in each indentation, enhancing every bite. Sprinkle sea salt across the surface for a final seasoning. Bake for 22-25 minutes, until your No-Knead Focaccia is golden brown with a satisfyingly crispy crust. Cool on a rack before slicing to reveal the soft, inviting interior.
How to Serve No-Knead Focaccia
Garnishes
Nothing beats a plain No-Knead Focaccia fresh out of the oven, but you can elevate it beautifully with simple garnishes. Try fresh rosemary sprigs or a sprinkle of flaky sea salt right before baking to introduce herbal notes and a touch of crunch. For savory flair, infuse the top with thinly sliced garlic or sun-dried tomatoes. These additions not only brighten the flavors but also make your focaccia as pretty as it is delicious.
Side Dishes
This versatile bread shines alongside a variety of dishes. Pair it with rich, hearty soups like tomato basil or minestrone for dipping into flavorful broths. It also serves as an excellent canvas for cheese boards, offering a light, airy counterpoint to sharp cheeses and cured meats. A salad with vinaigrette can balance the richness of focaccia, making it perfect for a satisfying lunch or dinner.
Creative Ways to Present
Think beyond the usual slice! Serve your No-Knead Focaccia torn into rustic chunks ideal for communal dining. Or transform it into an open-faced sandwich piled high with your favorite Mediterranean toppings—imagine creamy mozzarella, cherry tomatoes, and fresh basil. For brunch, toast slices lightly, spread with ricotta, drizzle honey, and add figs for a sweet surprise. This bread begs to be played with, proven by your own creativity.
Make Ahead and Storage
Storing Leftovers
Since this No-Knead Focaccia tastes best fresh, try to enjoy it the same day if you can. If you have leftovers, wrap the bread completely in plastic wrap and cover with a tea towel at room temperature. This combo locks in moisture and keeps the focaccia soft and enjoyable up to two days without sacrificing quality. Just note the crust may soften slightly, but the inside remains tender and perfect for sandwiches.
Freezing
To save extra focaccia for a longer time, slice it and freeze the pieces individually wrapped in plastic or foil. This allows you to thaw only what you need later. When properly stored, the focaccia can keep for up to three months in the freezer, preserving its lovely texture and flavor until you’re ready to indulge again.
Reheating
Reheat leftover or thawed focaccia by warming it in a preheated oven at 350°F (175°C) for about 5-7 minutes. You can sprinkle a light brush of olive oil before reheating to revive the crispy crust. Avoid microwaving if possible, as it can make the bread chewy rather than delightfully fluffy and crunchy.
FAQs
Can I use regular table salt instead of sea salt?
While you can substitute table salt, reduce the amount to 2 teaspoons since table salt has finer grains and is more concentrated than sea salt. Using sea salt gives your No-Knead Focaccia those desirable bursts of salinity and texture that enhance the bread’s overall character.
Is it necessary to use instant dry yeast?
Instant dry yeast is preferred for its convenience, but you can also use active dry yeast with a few extra steps. Activate it first by mixing it with warm water and a little sugar until bubbly, then add to your dough. This ensures your No-Knead Focaccia rises properly and achieves its signature lightness.
Why doesn’t this recipe require kneading?
The No-Knead Focaccia relies on long resting and folding intervals to develop gluten gradually. This gentle approach yields a soft, airy crumb without the elbow grease of traditional kneading—perfect for busy bakers who still want exceptional bread.
How do I make those perfect dimples on top?
Coat your fingertips with olive oil before pressing them gently into the dough’s surface. This prevents sticking, allows you to create even indentations, and traps flavorful olive oil in every dimple, resulting in that classic focaccia look and taste.
Can I add toppings before baking?
Absolutely! Adding toppings like herbs, olives, cherry tomatoes, or garlic before baking infuses the bread with extra flavor and elevates its presentation. Just be mindful not to overload the dough to maintain a good rise and texture.
Final Thoughts
Embracing the No-Knead Focaccia recipe is like opening the door to effortless baking with seriously impressive results. Its simple ingredients and approachable methods create an irresistible bread that’s fluffy on the inside and crispy on the outside, with that unmistakable olive oil aroma we all crave. Whether you tuck it into sandwiches, pair it with meals, or enjoy it plain, this focaccia will quickly become a kitchen staple, one you’ll be proud to share and eager to bake again and again.
Print
No-Knead Focaccia Recipe
- Total Time: 1 hour 45 minutes to 14 hours 25 minutes (includes varying rise times)
- Yield: One 9x13 inch focaccia, about 8 to 10 servings 1x
- Diet: Vegetarian
Description
This No-Knead Focaccia recipe creates a rustic, soft, and flavorful Italian bread with minimal effort. Using a wet, sticky dough and a combination of stretch and fold techniques, the bread develops a strong gluten structure without heavy kneading. The focaccia features a crispy golden crust, characteristic dimples on top, and is seasoned with sea salt and olive oil, perfect for sandwiches or as a side to any meal.
Ingredients
Wet Ingredients
- 500 ml warm water
- 1 Tablespoon olive oil
Dry Ingredients
- 1 Tablespoon sugar
- 1 Tablespoon sea salt (not table salt)
- 2 teaspoons instant dry yeast
- 550 grams bread flour
Instructions
- Mix Ingredients: In a large mixing bowl, add warm water, sugar, sea salt, yeast, and olive oil. Whisk these together thoroughly. Then add the bread flour and mix with a Danish dough hook or the neck of a wooden spoon for about 1 minute, or until the dough forms a wet, sticky, shaggy consistency. Cover with a tea towel and let it rest for 10 minutes.
- Stretch and Fold: Wet your hands to handle the sticky dough. Perform stretch and fold around the dough at 12, 3, 6, and 9 o’clock positions by pulling and folding the dough over itself. Cover and rest for 10 minutes. Then, using the coil method, gently lift and fold the dough using its own weight by turning the bowl 90 degrees between folds. Repeat this coil fold 3 more times every 10 minutes, strengthening the gluten network.
- First Rise (Bulk Fermentation): Coat the bowl and dough with about 3 tablespoons of olive oil. Cover with plastic wrap and a tea towel. Let the dough rise in a warm spot at room temperature for 1 to 1 ½ hours, or refrigerate for 4 to 12 hours. The dough should double in size and become bubbly.
- Shape the Dough: Remove the plastic wrap and gently open the dough by moving the bowl back and forth to release bubbles. Drizzle olive oil into a 9×13 inch non-stick baking pan (optionally lined with parchment). Transfer the dough into the pan, fold into thirds, rotate, and flip to get a smooth surface on top. Gently spread dough to corners without forcing. Cover and proof at room temperature for at least 1 hour until the dough stretches to the edges.
- Preheat Oven: Preheat your oven to 450°F (232°C) during the final proof.
- Dimple and Season: Remove plastic wrap, drizzle olive oil over the dough top. Coat fingertips with olive oil and press into the dough to create characteristic dimples while making sure the dough springs back softly. Sprinkle generously with sea salt.
- Bake: Bake in the preheated oven for 22 to 25 minutes until golden brown and crispy. Oven times may vary slightly based on oven strength.
- Cool and Serve: Transfer the baked focaccia to a wire rack and let cool before slicing to preserve texture and flavor.
Notes
- Use sea salt for best flavor and texture; if unavailable, reduce salt to 2 teaspoons if substituting table salt.
- If your room is drafty or cool, place your covered dough bowl inside an unheated oven with the door closed to provide a warmer rise environment.
- Weigh ingredients for accuracy, especially flour, to avoid dry dough. Use a scale or fluff and spoon flour into measuring cup without scooping directly.
- You can substitute instant yeast with active dry yeast at a 1:1 ratio, but activate active yeast first by proofing it in warm water with sugar until bubbly (8-10 minutes).
- Focaccia is best eaten the same day but can be stored wrapped tightly at room temperature up to two days; crust will soften.
- Follow the stretch and fold steps carefully to develop gluten structure without kneading.
- This recipe’s dough is quite wet and sticky; wetting your hands helps manage the dough during shaping.
- Prep Time: 20 minutes
- Cook Time: 25 minutes
- Category: Bread
- Method: No-knead with stretch and fold, baking
- Cuisine: Italian
Nutrition
- Serving Size: 1 slice (approx. 80g)
- Calories: 180 kcal
- Sugar: 1 g
- Sodium: 582 mg
- Fat: 2 g
- Saturated Fat: 0.3 g
- Unsaturated Fat: 1.5 g
- Trans Fat: 0 g
- Carbohydrates: 34 g
- Fiber: 1 g
- Protein: 5 g
- Cholesterol: 0 mg
Keywords: no knead focaccia, easy focaccia, Italian bread, stretch and fold bread, olive oil focaccia, homemade focaccia, no knead bread, sea salt focaccia


