
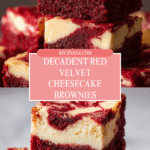
Red Velvet Brownies Recipe
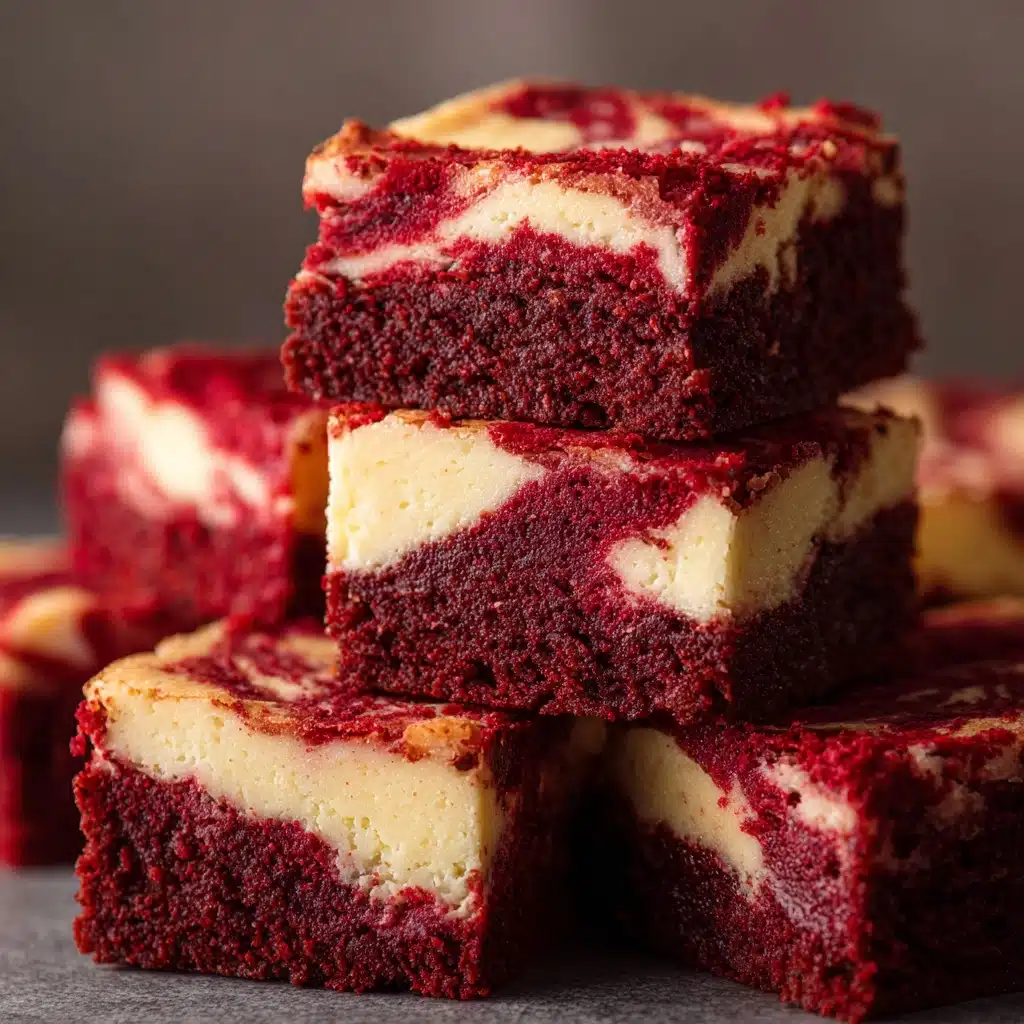
If you’ve ever dreamed of Red Velvet flavor wrapped up in brownie form, you’re in for an absolute treat! Red Velvet Brownies combine the luscious, cocoa-kissed allure of classic red velvet cake with the dense, fudgy decadence of a brownie. Each lavishly marbled bite is a mosaic of vibrant scarlet and rich cream cheese, making it as stunning to share as it is to devour. Whether for a party, a holiday tray, or simply because you deserve something special, these bars will win hearts wherever you bring them. Prepare for these show-stopping Red Velvet Brownies to steal the spotlight at your dessert table!
Ingredients You’ll Need
Ingredients You’ll Need
Making Red Velvet Brownies couldn’t be easier, and every ingredient plays a starring role in creating their chewy texture, vibrant color, and irresistible tang. Let’s break down what you’ll need and why each piece matters for that unforgettable finished result!
- Unsalted Butter: Adds richness and a soft, moist crumb while letting you control the saltiness of the brownies.
- Caster Sugar: Sweetens the batter and helps create a crackly top iconic to a great brownie.
- Vanilla Extract: Deepens the overall flavor and adds aromatic complexity to both the brownie and the cream cheese layers.
- Red Food Colouring: Delivers that signature vibrant hue unmistakable in red velvet treats.
- Medium Eggs: Provide structure and chew, ensuring each bite is dense but never dry.
- Cocoa Powder: Offers a lightly chocolaty undertone without overwhelming the classic red velvet flavor profile.
- Plain Flour: Forms the base of the batter, holding all the gooey deliciousness together.
- White Wine Vinegar: Brightens up the flavors and gives that unique tang you expect from red velvet desserts.
- Full-Fat Cream Cheese: Brings the creamy swirl, adding luxurious richness to each bite.
- Caster Sugar (for filling): Gently sweetens the cream cheese layer for the perfect balance.
- Vanilla Extract (for filling): Enhances the creaminess with a subtle layer of warmth and sweetness.
- Egg Yolk: Adds silkiness and structure to the cream cheese swirl, ensuring it bakes up decadently smooth.
How to Make Red Velvet Brownies
Step 1: Prep the Pan and Oven
Start by preheating your oven to 180°C (160°C Fan). Line a 9×9-inch square baking tin with parchment paper, allowing a little overhang for easy removal later. Lining the pan is crucial for achieving neat, liftable Red Velvet Brownies every single time.
Step 2: Cream the Butter and Sugar
Add the unsalted butter and caster sugar together in a large mixing bowl. Beat with an electric mixer (or by hand with a sturdy spoon) until pale, light, and combined. This builds a soft, melt-in-the-mouth foundation for the glossy brownie batter.
Step 3: Mix in Vanilla and Food Colouring
Combine the vanilla extract and red food colouring in a small cup until you have a silky, bright red liquid. Pour this vibrant mixture into your butter and sugar combo, and mix thoroughly. It’s so much easier to get an even scarlet hue this way—no random dye pockets!
Step 4: Add Eggs, Cocoa, and Flour
Add the eggs one at a time, beating well after each addition. Next, tip in the cocoa powder and plain flour. Mix until just combined—overmixing can make brownies tough, so stop when you see no more dry streaks. This is where that classic dense brownie structure really starts to form.
Step 5: Finish with Vinegar
Pour in the white wine vinegar and quickly fold it through. This little splash is Red Velvet magic—it perks up the flavors and helps maintain that beautifully tender crumb. Remember, less mixing is more at this stage!
Step 6: Make the Cream Cheese Swirl
In a clean bowl, beat together the full-fat cream cheese, caster sugar, and vanilla extract until smooth and creamy. Add the egg yolk and beat again just until blended. This lush filling creates the stunning swirl and that perfect tangy contrast within your Red Velvet Brownies.
Step 7: Assemble the Layers
Spoon about 90 percent of the brownie mixture into your prepared pan and smooth it out. Dollop the cream cheese mixture over the top in big, generous swirls, then add the remaining brownie batter in little spoonfuls over everything. This layering makes those gorgeous marbled ribbons throughout each slice.
Step 8: Swirl and Bake
Take a butter knife or a skewer and gently swirl the batters together. Don’t overdo it; a few elegant figure-eights are all you need for a stunning effect. Slide the pan into the oven and bake for 28-35 minutes (aim for about 30 minutes, but check with a toothpick that should come out with a few moist crumbs attached!).
Step 9: Cool and Slice
Once baked, let the brownies cool in the tin for 20 to 30 minutes, then carefully lift them out onto a wire rack to cool fully. This patience pays off—slicing Red Velvet Brownies while too warm leads to a gooey mess. Once they’re cool, cut into generous squares and marvel at your gorgeous handiwork!
How to Serve Red Velvet Brownies

Garnishes
For a truly eye-catching presentation, try sprinkling your brownies with a dusting of cocoa powder, a few white chocolate shavings, or an extra drizzle of melted chocolate. Fresh berries or a little powdered sugar also look beautiful alongside the bold red and creamy white swirls.
Side Dishes
Pair Red Velvet Brownies with a scoop of vanilla or mascarpone ice cream for a dreamy dessert plate. They also shine with a generous dollop of whipped cream or even a side of macerated strawberries for an extra-pop of brightness.
Creative Ways to Present
If you’re serving these for a special occasion, cut them into heart shapes with a cookie cutter or layer cubes into a trifle glass with fresh whipped cream and berries. For a party platter, stack the squares pyramid-style and scatter mini chocolate chips or edible petals between the layers. The possibilities for presenting Red Velvet Brownies are as endless as your imagination!
Make Ahead and Storage
Storing Leftovers
Red Velvet Brownies keep wonderfully fresh for up to 4 days when stored in an airtight container at room temperature. If your house is a bit warm or humid, consider slipping them into the fridge instead—they’ll stay dense, moist, and delicious.
Freezing
Want to get ahead or keep a secret stash for brownie emergencies? Red Velvet Brownies freeze brilliantly. Wrap each cooled square tightly in cling film, then pop them into a freezer-safe bag or container. They’ll taste just as heavenly for up to two months—just remember to thaw before serving!
Reheating
If you love your brownies gently warmed, microwave individual slices for 10-15 seconds until just soft, or pop a batch into a low oven for a few minutes. This brings out that gooey richness and makes the cream cheese swirl taste downright luscious.
FAQs
Can I use gel food coloring instead of liquid?
Absolutely! Gel food coloring is even more vibrant, so you might need a touch less for the same pop of color. Just be sure to mix it thoroughly with the vanilla before adding it to your batter to prevent streaks.
What’s the best way to tell when Red Velvet Brownies are done?
The toothpick test is your trusty guide! Insert a skewer into the center—if it comes out with a few moist crumbs but no raw batter, your brownies are ready. Don’t overbake; slightly underdone means extra fudgy bites.
Can I substitute reduced-fat cream cheese?
Full-fat cream cheese is the secret to that dreamy, creamy swirl. Reduced-fat versions can be watery, so if you must use them, blot excess moisture with paper towels before mixing—or your swirl may not set nicely.
How do I get sharp, clean brownie squares?
Let them cool completely, then use a large sharp knife. For ultra-clean cuts, dip your knife in hot water and dry it between slices. This works wonders, especially with that luscious cream cheese swirl!
Can I double the recipe for a crowd?
Yes! Simply double all the ingredients and use a 13×9-inch pan. Keep an eye on the baking time—larger batches often need a few extra minutes, but start checking around the 35-minute mark.
Final Thoughts
Give these Red Velvet Brownies a try and watch them turn any day into a celebration! From their stunning appearance to their delightfully tangy-creamy bites, they’re guaranteed to become one of your new favorite treats. Go ahead—treat yourself, share generously, and enjoy every last crumb!
Print
Red Velvet Brownies Recipe
- Total Time: 50 minutes
- Yield: 12 brownies 1x
- Diet: Vegetarian
Description
Indulge in these decadent Red Velvet Brownies that combine the rich flavors of red velvet cake with the fudgy goodness of brownies. A perfect treat for any occasion!
Ingredients
Brownie Mixture:
- 150 g Unsalted Butter
- 275 g Caster Sugar
- 2 tsp Vanilla Extract
- 1 tsp Red Food Colouring
- 4 Medium Eggs
- 30 g Cocoa Powder
- 125 g Plain Flour
- 1 tsp White Wine Vinegar
Cream Cheese Swirl:
- 250 g Full-Fat Cream Cheese
- 75 g Caster Sugar
- 1 tsp Vanilla Extract
- 1 Egg Yolk
Instructions
- Preheat Oven: Preheat your oven to 180°C/160°C Fan and line a 9×9′ square tin with parchment paper.
- Prepare Brownie Mixture: Beat together butter and caster sugar until combined. Mix vanilla extract and red food coloring, then add to the butter/sugar mixture.
- Add Eggs and Dry Ingredients: Beat in the eggs one at a time. Add cocoa powder and flour, mix until combined. Stir in white wine vinegar.
- Make Cream Cheese Swirl: In a bowl, mix cream cheese, caster sugar, and vanilla until smooth. Add egg yolk and mix well.
- Layer and Bake: Pour 90% of the brownie mixture into the tin, top with cream cheese mixture, then the remaining brownie mixture. Swirl together and bake for 28-35 minutes.
- Cool and Serve: Let the brownies cool in the tin for 20-30 minutes, then transfer to a wire rack to cool completely.
- Prep Time: 20 minutes
- Cook Time: 30 minutes
- Category: Dessert
- Method: Baking
- Cuisine: American
Nutrition
- Serving Size: 1 brownie
- Calories: 320
- Sugar: 23g
- Sodium: 180mg
- Fat: 18g
- Saturated Fat: 11g
- Unsaturated Fat: 5g
- Trans Fat: 0g
- Carbohydrates: 35g
- Fiber: 1g
- Protein: 5g
- Cholesterol: 100mg
Keywords: Red Velvet Brownies, Brownie Recipe, Cream Cheese Swirl, Dessert, Baking
