
Simple Strawberry Lemonade Popsicles Recipe
Introduction
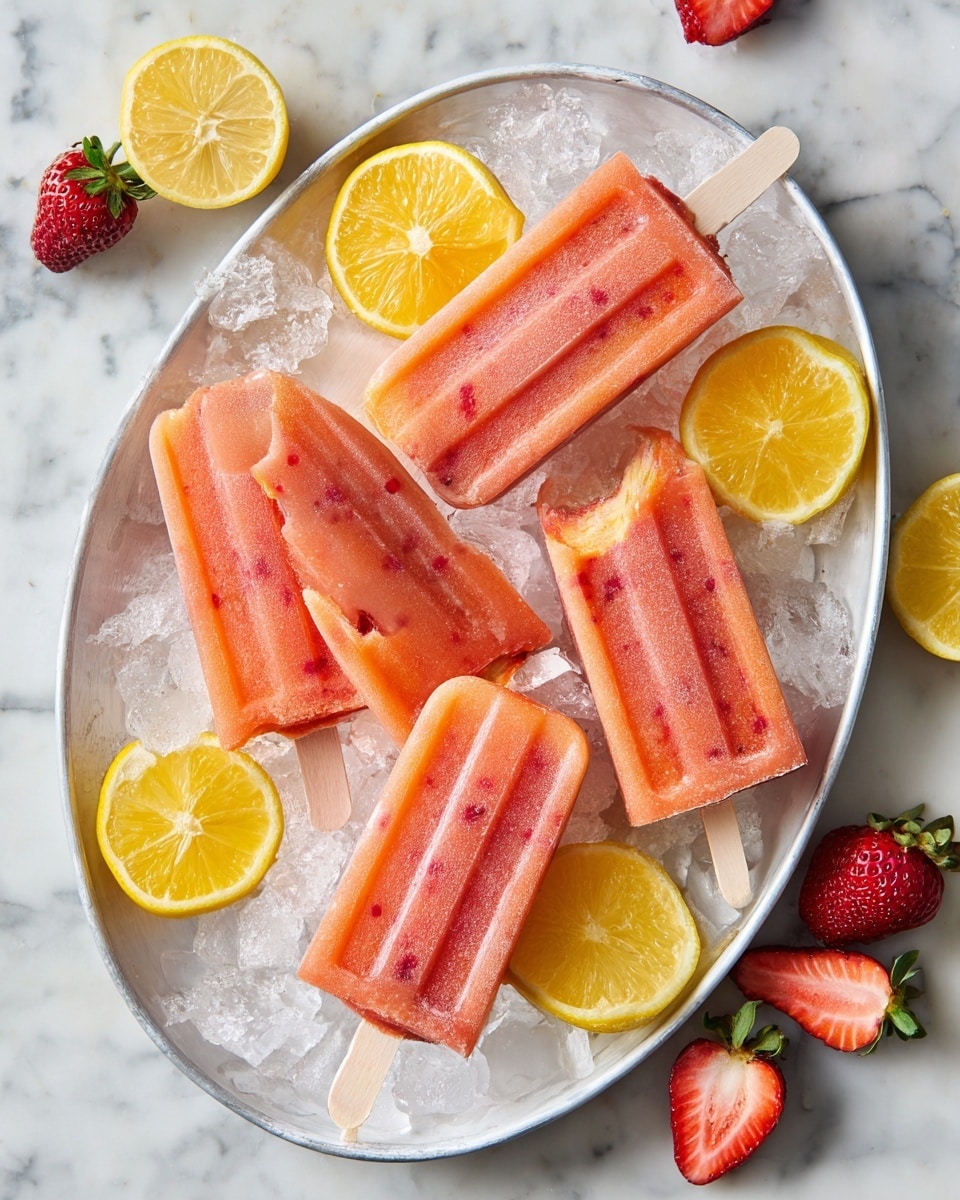
Strawberry lemonade popsicles are a quick and refreshing treat perfect for hot summer days. Made with just three simple ingredients, they’re easy to prepare and loved by kids and adults alike. Enjoy a cool burst of sweet strawberries and tangy lemonade in every bite.
Ingredients
- 1 container Simply Lemonade (or your favorite lemonade)
- 1 cup strawberries, diced
- 1 tablespoon sugar (optional)
Instructions
- Step 1: Add the diced strawberries and sugar to a small bowl. Mix gently and let sit for about 5–10 minutes until juices begin to form. You can lightly mash some strawberries if you like small pieces in your popsicles, or keep them larger.
- Step 2: Spoon the strawberry mixture evenly into your popsicle molds.
- Step 3: Pour lemonade over the strawberries in each mold, leaving a small space at the top for expansion during freezing.
- Step 4: Place the lids on the molds, insert popsicle sticks, and freeze for several hours until solid.
Tips & Variations
- If you prefer your strawberries evenly distributed throughout the popsicle, gently stir the molds once or twice while freezing, before completely solid.
- Swap the sugar for honey if you want a natural sweetener.
- Use thawed frozen strawberries instead of fresh when out of season.
- For a homemade lemonade version, feel free to use your favorite recipe to make the lemonade from scratch.
Storage
Store the popsicles in the freezer in an airtight container or well-covered molds. They will keep best for up to 2 weeks. To enjoy, simply remove from the freezer and let sit at room temperature for a minute or two before eating to make unmolding easier.
How to Serve
Serve this delicious recipe with your favorite sides.
FAQs
Can I use frozen strawberries?
Yes, thawed frozen strawberries work well for this recipe and can be used in place of fresh strawberries.
Do I have to add sugar?
No, sugar is optional. The lemonade is already sweet, but adding a tablespoon of sugar or honey enhances the flavor if you prefer a sweeter popsicle.
Print
Simple Strawberry Lemonade Popsicles Recipe
- Total Time: 4 hours 10 minutes
- Yield: 10 popsicles 1x
- Diet: Vegetarian
Description
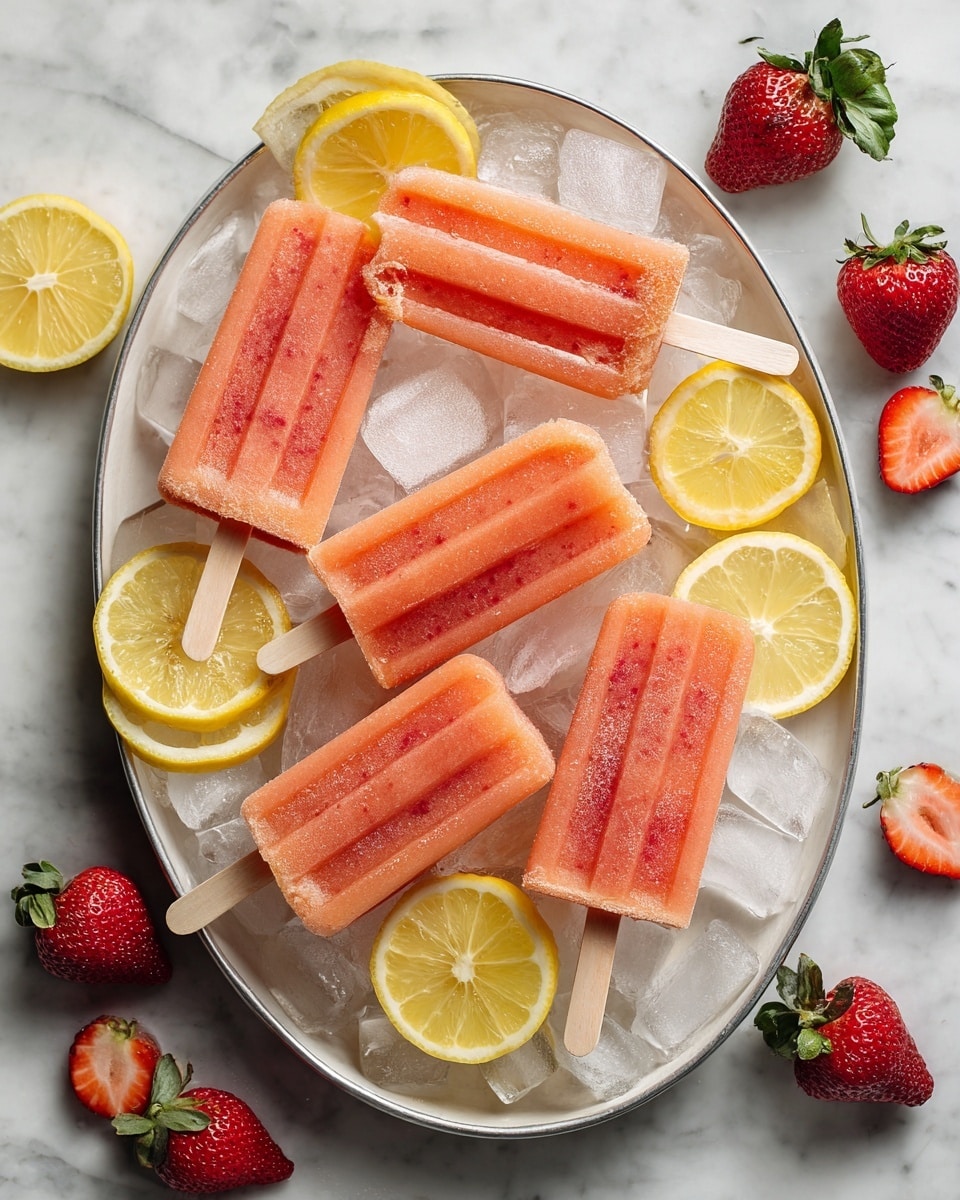
These homemade Strawberry Lemonade Popsicles are a refreshing and simple summer treat made with just three ingredients. Combining fresh diced strawberries, sweetened slightly with optional sugar, and poured over cool lemonade, these popsicles offer a delightful burst of fruity flavor that’s perfect for cooling down on hot days. Quick to prepare and easy for kids to enjoy, this semi-homemade recipe is a perfect go-to for a sweet yet light dessert.
Ingredients
Ingredients
- 1 container Simply Lemonade (or any preferred lemonade), approximately 64 fl oz
- 1 cup fresh strawberries, diced
- 1 tablespoon sugar (optional, can be substituted with honey)
Instructions
- Prepare Strawberry Mixture: Add diced strawberries to a small bowl and sprinkle the sugar on top. Mix gently, lightly mashing a few strawberries if desired, but keep most pieces intact so the popsicles have nice chunks of fruit. Allow this mixture to sit for about 10 to 15 minutes until the strawberries release their juices.
- Assemble Popsicles: Spoon the strawberry mixture evenly into each popsicle mold, dividing it until the mixture is completely used. Then, carefully pour lemonade into each mold, filling them nearly to the top but leaving a little space to allow for expansion during freezing.
- Insert Sticks and Freeze: Place the lids on the molds and insert popsicle sticks. Put the molds in the freezer and freeze until completely solid, which typically takes about 4 to 6 hours or overnight for best results.
- Optional Note on Strawberry Distribution: Some strawberries may float to the bottom while freezing. If you prefer the fruit evenly dispersed throughout your popsicles, gently stir the molds once or twice during the initial freezing phase. However, allowing the strawberries to settle creates a fun surprise of fruit at the bottom.
Notes
- Using fresh strawberries provides the best texture, but thawed frozen strawberries can also be used.
- Sugar is optional; you can adjust sweetness to taste or substitute with honey for a natural sweetener.
- If you want to make the popsicles completely from scratch, consider making your own homemade lemonade instead of using store-bought.
- Leave space in the popsicle mold for liquid expansion to avoid overflow.
- Freezing time can vary based on your freezer, but a minimum of 4 hours is recommended.
- Prep Time: 10 minutes
- Cook Time: 0 minutes
- Category: Dessert
- Method: Freezing
- Cuisine: American
Keywords: strawberry popsicles, lemonade popsicles, summer treat, easy popsicle recipe, frozen dessert, kids snack, refreshing dessert


