
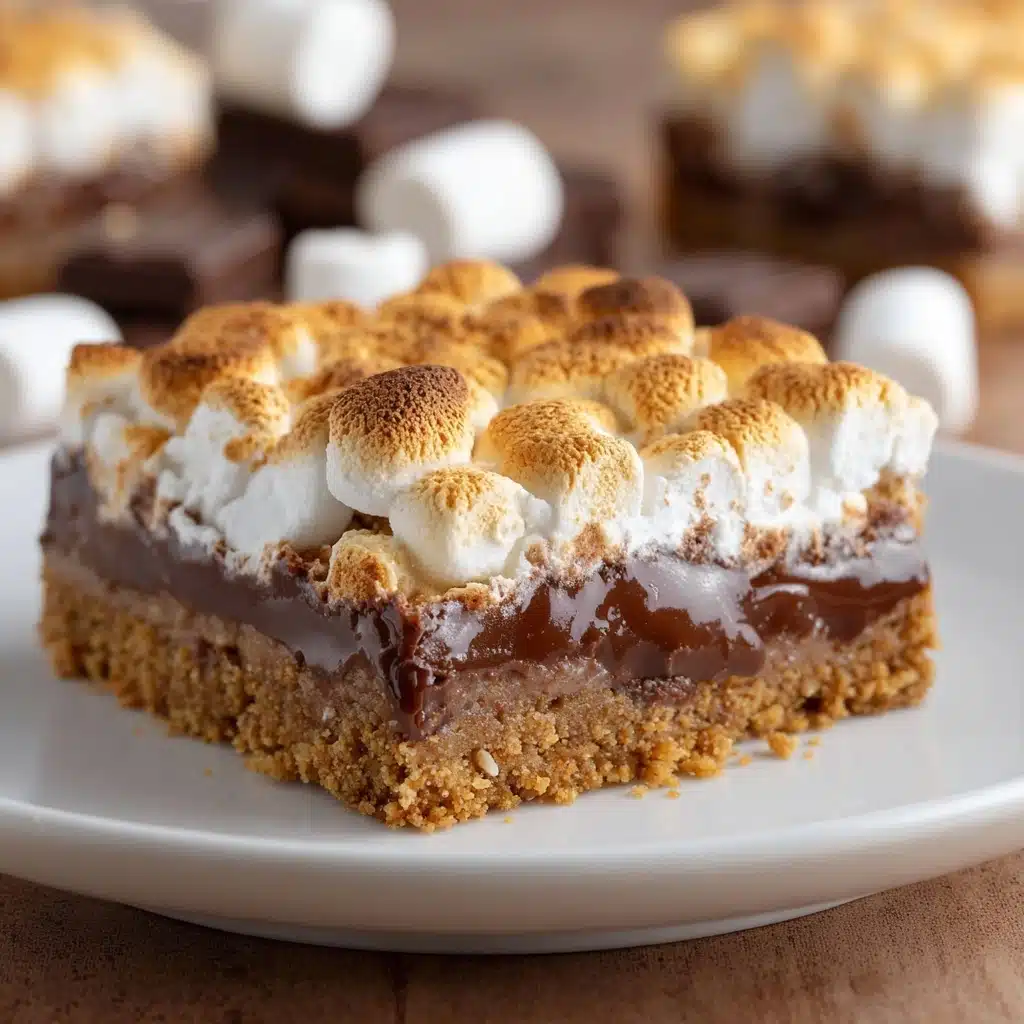
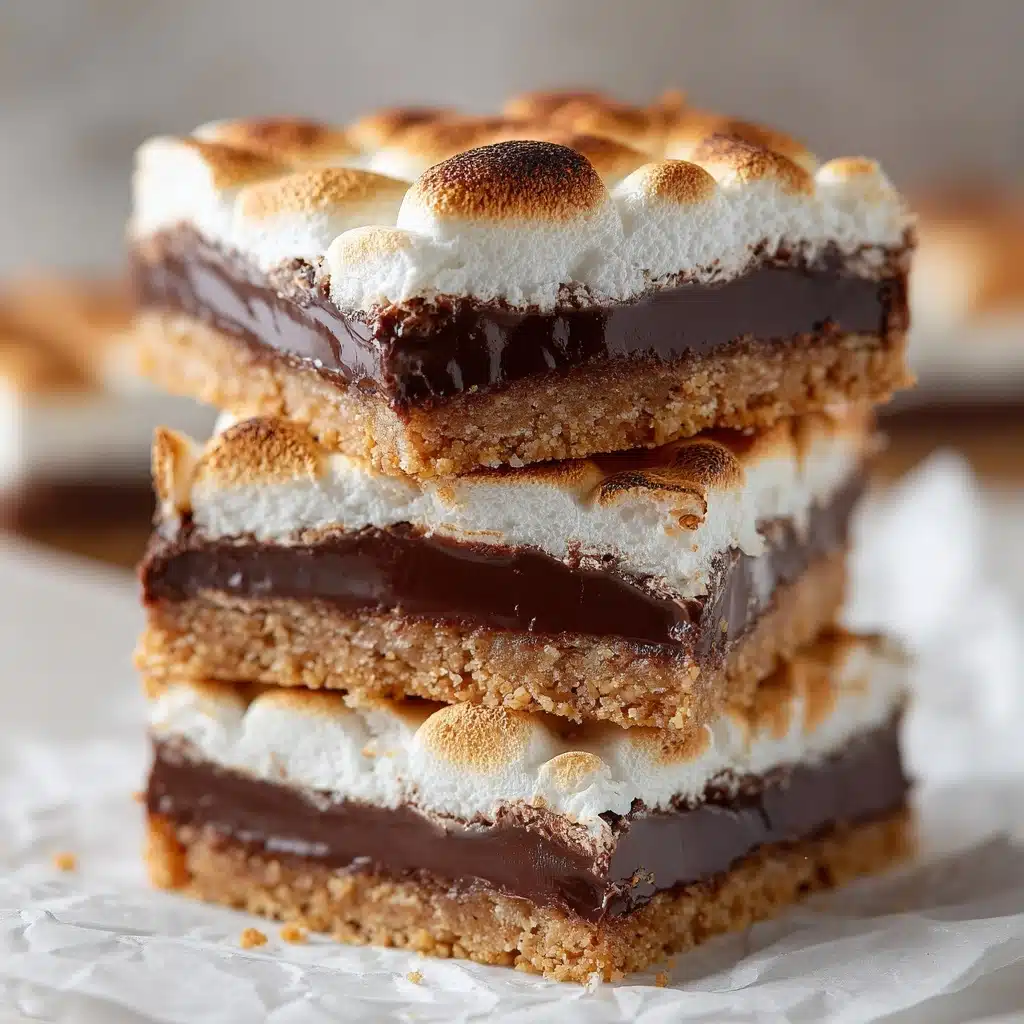
S’mores Bars Recipe
If you love everything about the nostalgia of campfire treats but want a less messy, homemade twist, these S’mores Bars are about to become your new obsession. Imagine buttery graham cracker crust, melting milk chocolate, and toasted marshmallows all layered in a single bite—no campfire or sticky fingers required. They capture the essence of everyone’s favorite childhood dessert, baked simply at home. Each bar is golden, gooey, and so rich, you’ll wonder how you ever lived without them.
Ingredients You’ll Need
You only need a short list of easy-to-find ingredients to create these scrumptious delights. Each one plays a crucial role: the graham crackers form the essential crunchy backbone, chocolate gives that melty richness, and marshmallows provide the perfect gooey finish. Here’s what you’ll need and why they matter:
- Graham cracker crumbs: The base for the S’mores Bars, delivering that signature toasty flavor with a hint of honey.
- Powdered sugar: Adds a touch of extra sweetness and helps bind the crust so it’s tender but not crumbly.
- Butter (melted): Makes the crust rich and helps the crumbs to pack together for a firm, sliceable foundation.
- Hershey’s chocolate bars: Authentic Hershey’s milk chocolate melts perfectly and gives these bars their classic s’mores taste.
- Mini marshmallows: These toast up beautifully for a gooey, golden finish that absolutely makes the S’mores Bars irresistible.
How to Make S’mores Bars
Step 1: Prep Your Pan and Oven
Start things off by preheating your oven to 350°F. Grab a 9 x 13-inch baking pan and give it a generous coating with non-stick butter spray. This step is more important than it sounds! A well-greased pan guarantees that your S’mores Bars lift out easily, with intact layers and no sticking disasters.
Step 2: Make the Graham Cracker Crust
In a medium mixing bowl, combine the graham cracker crumbs, powdered sugar, and melted butter. Stir until every crumb has soaked up buttery goodness and the mixture looks like damp sand. The butter lets the crust bake up golden and helps each bite hold together, instead of falling apart on the plate.
Step 3: Press and Shape Your Crust
Pour the prepared graham mixture into your pan. Now press it down very firmly using your fingers or the bottom of a measuring cup—don’t be shy! Press it up the sides a little bit too so the chocolate and marshmallow layers have a sturdy home. A well-packed crust means each S’mores Bar will slice beautifully and have that classic s’mores snap.
Step 4: Bake the Crust to Perfection
Place the pan in the preheated oven and bake for 5 to 8 minutes. Watch for the edges to start turning golden brown—this is flavor in the making. Once they look just right, remove the pan and let it cool slightly. This brief bake creates the ultimate crunchy foundation for the gooey layers to come.
Step 5: Layer on the Chocolate
Now for the best part: lay the Hershey’s bars in an even layer across the warm crust, making sure every inch is covered with chocolate. If a corner looks bare, break a piece to fit. The gentle heat of the still-warm crust will start melting the chocolate for that ooey gooey S’mores Bars magic.
Step 6: Melt the Chocolate
Return the pan to the oven for just about 3 minutes—just enough to soften the chocolate so it becomes glossy and spreadable. Don’t overdo it; you’re looking for shiny and just-starting-to-melt, so every bar turns out lusciously creamy without burning.
Step 7: Layer on the Marshmallows
Take the pan out and give it a quick rest for a minute or two to avoid burning your fingers. Next, sprinkle the mini marshmallows all over the chocolate, nestling them close together for that iconic, pillow-soft topping.
Step 8: Broil to Toasty Goodness
Crank the oven to broil and place the pan back in, watching like a hawk. Marshmallows can go from golden to burned in seconds! Let them broil for about 2 minutes, or until the tops are tinged with toasty brown spots. This final flourish transforms the S’mores Bars into a true campfire classic, right from your oven.
Step 9: Cool Completely and Slice
Once the marshmallows are perfectly toasted, remove the pan and let it cool completely before cutting. If you cut too soon, you’ll have a gooey (but delicious) mess. Patience pays off with perfectly layered, photogenic bars that hold together in every bite.
How to Serve S’mores Bars
Garnishes
For a festive touch, try sprinkling a handful of extra crushed graham crackers over the top, or drizzle a little melted chocolate across the marshmallows. If you have colorful sprinkles or even a pinch of flaky sea salt, those can make your S’mores Bars look bakery-worthy.
Side Dishes
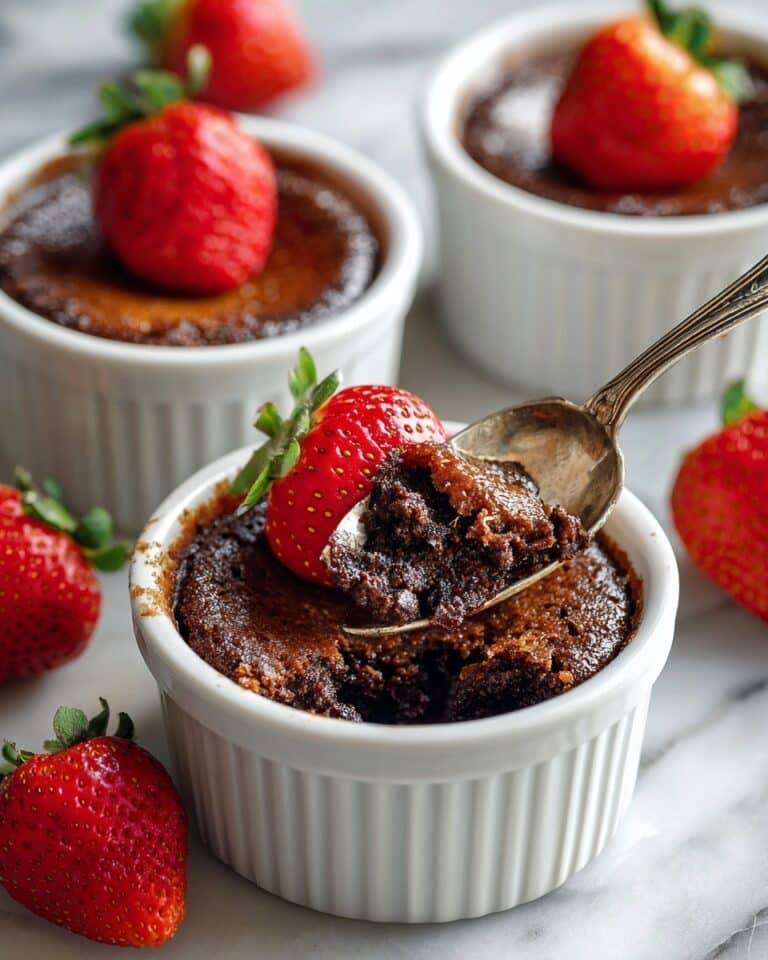
S’mores Bars are rich and sweet, so they pair delightfully with fresh fruit—strawberries, raspberries, or even sliced bananas. If you’re serving a crowd, put out a tray of crisp pretzels or salty nuts to balance that gooey, chocolatey sweetness.
Creative Ways to Present
Skip the plates and pop the bars onto a rustic wooden board for a campfire-inspired vibe. Try cutting the S’mores Bars into small squares and serving them as party bites, or create a DIY “s’mores sundae bar” where guests can crumble the bars over vanilla ice cream!
Make Ahead and Storage
Storing Leftovers
Got leftovers? Lucky you! Store S’mores Bars in an airtight container at room temperature for up to three days. This keeps the crust crisp and the marshmallows nice and soft. If it’s extra warm in your kitchen, refrigerate them to keep the chocolate from melting.
Freezing
Want to stash some for another time? S’mores Bars freeze surprisingly well. Once completely cooled, slice and wrap each bar in parchment paper, then pop them in a freezer-safe container. When the craving hits, thaw at room temperature for about an hour.
Reheating
If you love your S’mores Bars a little warm and gooey, just microwave individual pieces for 10 to 12 seconds, or slide a batch onto a baking sheet and reheat at 300°F for a few minutes. Just be careful not to overheat, or the marshmallows might puff up a bit too much.
FAQs
Can I use chocolate chips instead of Hershey’s bars?
Absolutely! While classic Hershey’s bars give S’mores Bars their signature nostalgia, semisweet or milk chocolate chips work great and melt just as smoothly. Use the same total weight and sprinkle them evenly over the crust before melting.
How do I keep the marshmallow layer from sticking to my knife?
The secret is patience and a little kitchen magic: let the bars cool completely, then spray your knife lightly with nonstick spray or run it under hot water before each slice. Clean the blade between cuts for the cleanest pieces.
Can I make these S’mores Bars gluten-free?
Yes! Swap in your favorite gluten-free graham crackers and check that your chocolate and marshmallows are gluten-free brands. The taste and texture are just as dreamy, so everyone can enjoy!
Should I use salted or unsalted butter for the crust?
Either works, but using salted butter adds an extra layer of flavor and helps balance the sweetness in S’mores Bars. If you like things a touch salty-sweet, go for the salted version.
Can I make S’mores Bars ahead of time?
Definitely. You can prepare them a day in advance—just let them cool fully and cover tightly. They taste just as good the next day and make party prep super easy!
Final Thoughts
If you’re craving cozy, gooey, chocolate-drenched treats with minimal fuss, you can’t go wrong with these S’mores Bars. They bring together everything you love about campfire s’mores, right from your oven—no sticky fingers or smoke required. Trust me, once you’ve tasted how sensational they are, you’ll find yourself coming back to this recipe again and again!
Print
S’mores Bars Recipe
- Total Time: 25 minutes
- Yield: 12 bars 1x
- Diet: Vegetarian
Description
Indulge in the nostalgic flavors of a classic campfire treat with these delicious S’mores Bars. A simple and satisfying dessert that combines graham crackers, chocolate, and gooey marshmallows in every bite.
Ingredients
Graham Cracker Crust:
- 2 cups graham cracker crumbs
- ½ cup powdered sugar
- 8 to 12 tablespoons butter, melted
Topping:
- 4 Hershey’s chocolate bars (4.4-ounce bars)
- 10 ounces mini marshmallows (1 package)
Instructions
- Preheat the oven: Preheat the oven to 350°F and grease a 9 x 13-inch pan with non-stick butter spray.
- Prepare the crust: In a medium bowl, mix graham cracker crumbs, powdered sugar, and melted butter. Press the mixture into the bottom of the pan.
- Bake the crust: Bake for 5 to 8 minutes until golden brown. Cool the crust.
- Add chocolate: Place Hershey’s bars on top of the crust.
- Melt the chocolate: Bake for 3 minutes until chocolate begins to melt.
- Add marshmallows: Place marshmallows on top of the chocolate.
- Broil: Broil for 2 minutes until marshmallows brown.
- Cool and serve: Cool completely, then cut and serve.
Notes
- For a gooier texture, broil the marshmallows longer for a toasted finish.
- Experiment with different chocolate varieties for a unique twist on this classic recipe.
- Prep Time: 15 minutes
- Cook Time: 10 minutes
- Category: Dessert
- Method: Baking
- Cuisine: American
Nutrition
- Serving Size: 1 bar
- Calories: 250
- Sugar: 18g
- Sodium: 150mg
- Fat: 10g
- Saturated Fat: 6g
- Unsaturated Fat: 4g
- Trans Fat: 0g
- Carbohydrates: 38g
- Fiber: 1g
- Protein: 2g
- Cholesterol: 15mg
Keywords: S’mores Bars, dessert, graham crackers, chocolate, marshmallows, easy recipe


