
Easiest Soft Sourdough Sandwich Bread Recipe
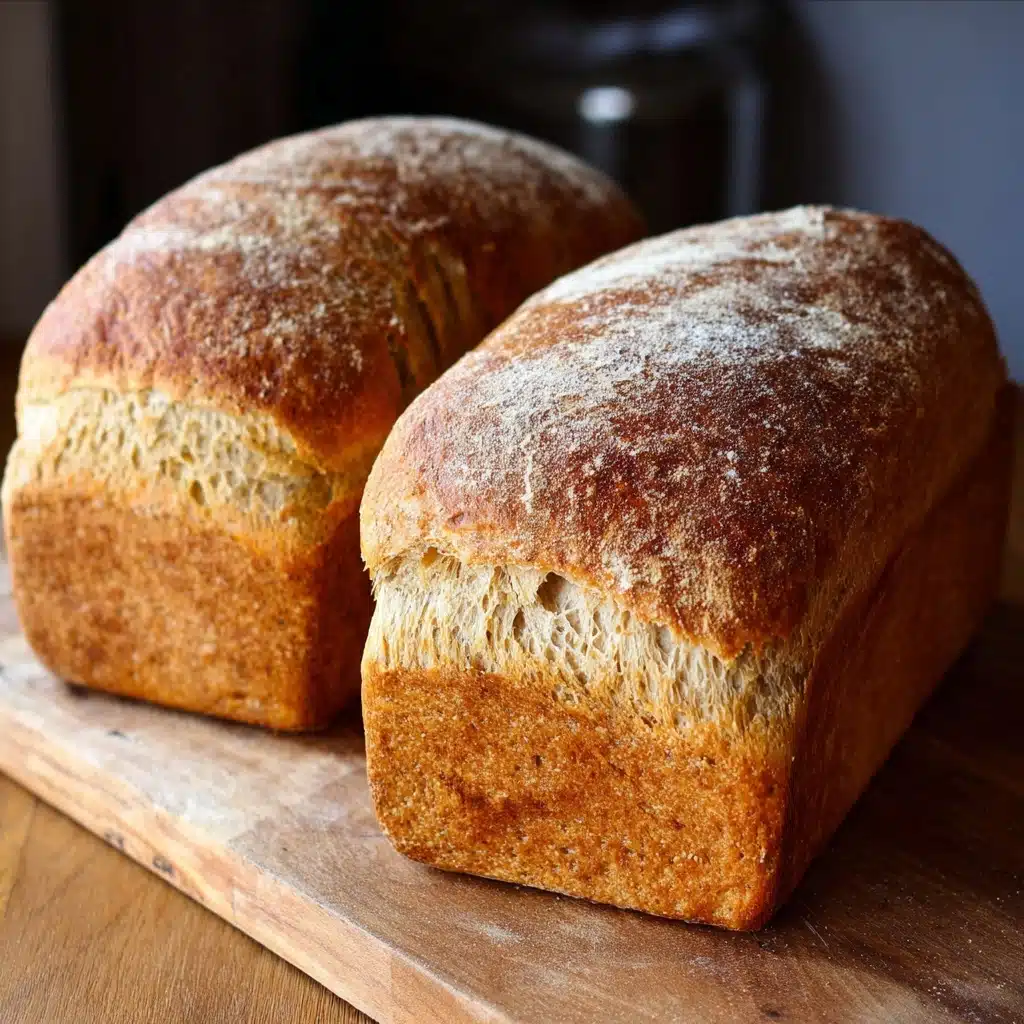
If you’ve ever dreamed of baking your own sandwich bread that is tender, fluffy, and bursting with that signature tangy sourdough flavor, then this recipe for the Easiest Soft Sourdough Sandwich Bread is your new best friend. With straightforward ingredients and simple steps, it delivers a perfectly soft crumb and golden crust that makes sandwiches sing, toast turn heavenly, and lunchboxes a little brighter. Whether you’re a sourdough veteran or just starting out, you’ll love how accessible and rewarding this bread is to make at home.
Ingredients You’ll Need
Every ingredient in this recipe plays a key role in crafting that soft texture and rich flavor we are after. From the active sourdough starter that gives the bread its unique tang, to the butter and honey that add subtle sweetness and tenderness, each component works together beautifully to create this comforting loaf.
- Active sourdough starter: The heart of the bread that provides natural leavening and complex flavor.
- Raw honey: Adds a gentle sweetness and helps keep the bread moist and tender.
- Grass-fed butter, melted: Enhances the richness and softness of the crumb.
- Filtered water: Creates the ideal dough consistency and helps support fermentation.
- Sea salt: Balances the sweetness and strengthens the gluten structure for better rise.
- Bread flour: High protein flour that develops the chewy, airy texture perfect for sandwich bread.
How to Make Easiest Soft Sourdough Sandwich Bread
Step 1: Preparing the Honey-Butter Mixture
Begin by gently melting the butter over very low heat until almost fully liquid. Turn off the heat and stir in the raw honey, allowing the warmth to soften the honey without harming the active sourdough starter later. Let this mixture cool until it feels comfortably warm to the touch—the temperature is key here to preserve the yeast’s vitality. This step ensures your bread’s tenderness and subtle sweetness will shine through.
Step 2: Mixing and Kneading the Dough
In a large bowl, combine the bubbly sourdough starter with warm water, sea salt, and the cooled honey-butter blend. Give it a gentle stir until blended, then gradually add the bread flour. Use a wooden spoon initially as the dough thickens, then switch to your hands to knead. Spend about five minutes kneading until you have a smooth, elastic ball. This kneading helps develop the gluten network that supports the bread’s soft yet sturdy crumb. Cover the dough with plastic wrap and let it rise for 8 to 12 hours, or overnight, giving it plenty of time to ferment and develop flavor.
Step 3: Shaping and Second Rise
The morning after your long, slow rise is when the magic continues. Prepare two loaf pans by lining them with parchment paper to prevent sticking, then divide your risen dough into two equal parts. Shape each piece into a loaf and place it snugly in the pans. Cover again—plastic wrap or a damp towel works—and give your dough another hour or two to puff up until it doubles in size. This second rise ensures delicate softness inside and a perfect structure for slicing.
Step 4: Baking to Perfection
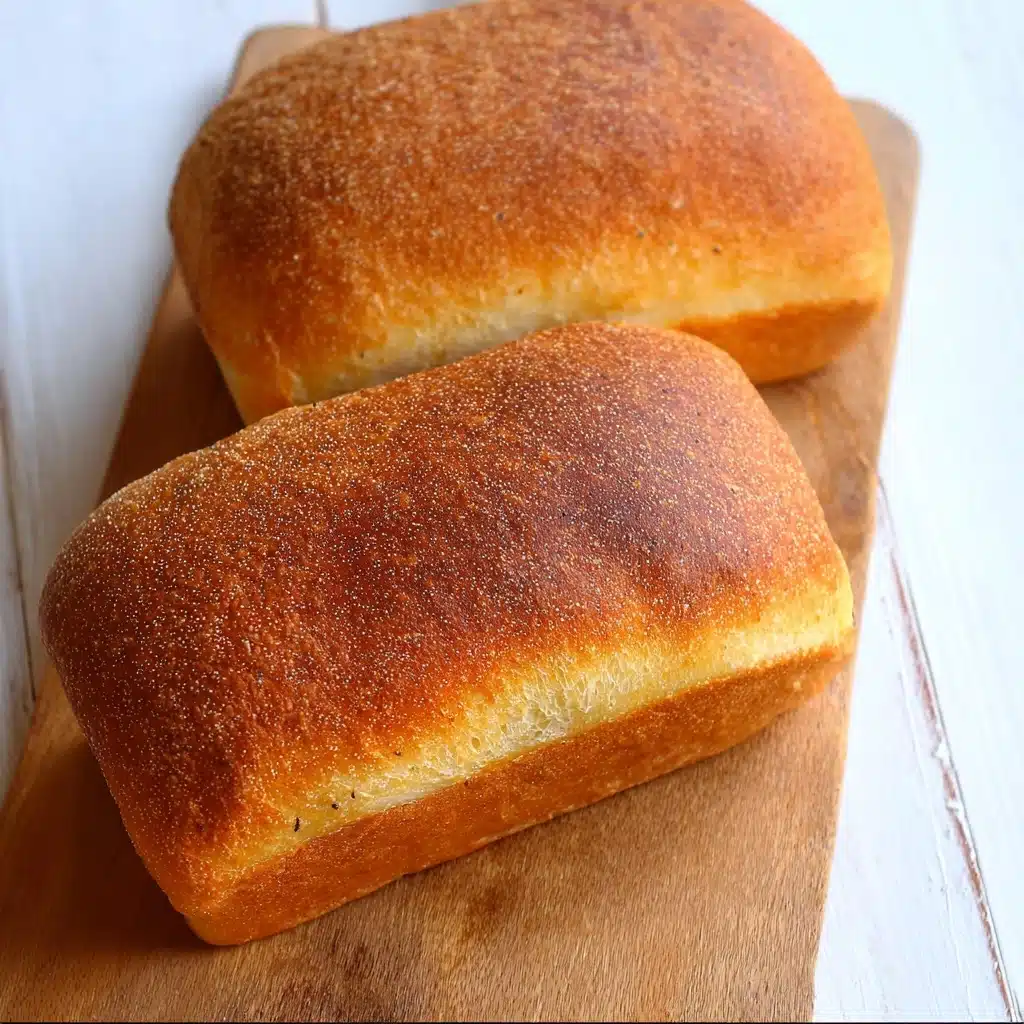
Preheat your oven to 400°F as your loaves finish their final rise. Bake the bread for 30 to 35 minutes, keeping an eye near the end so the crust reaches a lovely golden brown without burning. The warmth of your oven transforms the dough into a beautiful loaf with a tender inside and crisp, golden outside. This baking stage seals in all that flavor and texture you’ve patiently built up.
Step 5: Cooling and Enjoying
Once baked, allow the loaves to cool in their pans for about ten minutes before transferring them to a wire rack to cool completely. This resting period is essential—it lets the crumb set properly and stops the bread from becoming gummy. You can enjoy the bread warm for extra comfort or wait until cooled for easier slicing. Stored in airtight bags, your Easiest Soft Sourdough Sandwich Bread stays wonderfully fresh for a few days.
How to Serve Easiest Soft Sourdough Sandwich Bread
Garnishes
The simple beauty of this soft sourdough makes it a perfect canvas for all kinds of toppings. Spread with quality butter, drizzle a splash of honey, or layer with fresh herbs and sea salt for a gourmet touch. Toasting slices and adding smashed avocado with a pinch of chili flakes creates an irresistible treat. The mild tang gives you a versatile base that complements both sweet and savory garnishes brilliantly.
Side Dishes
Pair your sandwich bread with hearty soups like tomato bisque or butternut squash, where the soft bread soaks up every flavorful spoonful. A crisp salad with vinaigrette or roasted vegetables balances richness with freshness. For an indulgent snack, serve slices alongside your favorite cheese platter or charcuterie board. These side dishes elevate your simple sandwich bread into a memorable meal.
Creative Ways to Present
Think beyond the classic sandwich: use thick slices for French toast or bread pudding, or cut into cubes for croutons that add crunch to salads and soups. Hollowed-out loaves turn into edible bread bowls perfect for creamy dips and stews. Celebrate your baking success by arranging slices with colorful spreads and toppings for a beautiful party platter. The Easiest Soft Sourdough Sandwich Bread lends itself to endless creativity.
Make Ahead and Storage
Storing Leftovers
To keep your sandwich bread fresh, store cooled loaves in an airtight container or resealable bag at room temperature for up to three days. This retains the soft crumb and keeps the crust from drying out. Avoid refrigeration, as it tends to make sourdough bread stale faster.
Freezing
If you want to enjoy this bread longer, freezing is a great option. Wrap the loaf tightly in plastic wrap and place it inside a freezer bag. Frozen loaf will stay fresh for up to three months. When ready, thaw at room temperature for a few hours or toast slices straight from the freezer for convenience.
Reheating
To bring back that freshly baked softness, reheat slices in a toaster or warm the entire loaf in a 350°F oven for about 10 minutes. This refreshes the crust’s crispness and revives the bread’s tender crumb, making it just as delightful as the day you baked it.
FAQs
Can I use a different type of flour for this recipe?
Bread flour is preferred because its higher protein content creates the best gluten structure for a soft and chewy sourdough crumb, but you might substitute all-purpose flour with slightly different texture results. Just know the rise and softness may be affected.
How do I know if my sourdough starter is active enough?
Your starter should be bubbly and doubled in size within a few hours of feeding. It should float in water when ripe, indicating it has enough air trapped to leaven the dough effectively. An active starter is essential for the best rise and flavor in this bread.
Is it okay to use regular honey instead of raw honey?
Yes, regular honey can be used, but raw honey contains more natural enzymes and flavors that contribute to the bread’s subtle depth. Still, any honey will add sweetness and moisture that enhance the loaf nicely.
What if I don’t have parchment paper for the loaf pans?
You can grease the pans thoroughly with butter or oil instead. While parchment helps with easy removal, well-greased pans will also prevent sticking, allowing you to lift the loaves out cleanly.
Can I make this bread without a sourdough starter?
This recipe relies on the starter for both rise and flavor, so omitting it would fundamentally change the bread. For a no-starter version, you’d want to try a different yeast-based sandwich bread recipe instead for best results.
Final Thoughts
Baking the Easiest Soft Sourdough Sandwich Bread is such a rewarding experience—from the first aromatic rise to slicing into that pillow-soft crumb. It’s a recipe that invites you to slow down, savor the process, and enjoy a truly delicious loaf fresh from your oven. I wholeheartedly encourage you to give it a try and experience how simple ingredients and love can come together to create a bread that feels like a warm hug in every bite.
Print
Easiest Soft Sourdough Sandwich Bread Recipe
- Total Time: 9 hours to 13 hours (including fermentation and proofing times)
- Yield: 2 loaves 1x
- Diet: Vegetarian
Description
This soft sourdough sandwich bread recipe yields a tender, flavorful loaf with a slightly sweet richness from raw honey and butter. Using an active sourdough starter and an overnight rise creates a naturally leavened bread perfect for sandwiches or toasting. The method is simple and forgiving, ideal for home bakers seeking soft crumb without compromising sourdough depth and chew.
Ingredients
Starter and Liquids
- 1 cup active and bubbly sourdough starter
- 1/2 cup raw honey
- 1/2 cup grass-fed butter, melted
- 1 1/2 cups filtered water
Dry Ingredients
- 1 tsp sea salt
- 5 cups bread flour
Instructions
- Prepare Honey Butter Mixture: Melt the grass-fed butter in a saucepan over very low heat until almost fully melted. Turn off the heat and stir in the raw honey. Mix gently to allow the butter to finish melting and the honey to soften, then let the mixture cool until it’s comfortably warm to the touch to avoid killing your sourdough starter.
- Mix and Knead Dough: In a large bowl, combine the active sourdough starter, filtered water, sea salt, and the warm honey butter mixture. Stir to combine, then gradually add the bread flour. Start mixing with a wooden spoon until it becomes difficult, then use your hands to fully incorporate the flour. Knead the dough for about 5 minutes until a cohesive ball forms. Cover the bowl with plastic wrap and allow the dough to rise at room temperature for 8 to 12 hours or overnight.
- Shape Loaves and Second Rise: The next morning, line two loaf pans with parchment paper. Divide the dough evenly and shape each portion into a loaf. Place the loaves into the prepared pans, cover with plastic wrap or a damp clean towel, and let rise for 1 to 2 hours until the dough doubles in size.
- Bake the Bread: Towards the end of the second rise, preheat your oven to 400°F (204°C). Bake the loaves for 30 to 35 minutes. Keep a close eye during the last few minutes to prevent burning, as oven temperatures can vary.
- Cool and Store: Remove the pans from the oven and allow the loaves to cool in the pans for 10 minutes. Then transfer the bread to a cooling rack to cool completely. Enjoy warm or let cool fully before storing in airtight Ziploc bags. Consume within 3 days for the best freshness.
Notes
- Ensure your sourdough starter is active and bubbly for best results.
- Do not add hot butter-honey mixture directly to the starter as it may kill the yeast—let it cool first.
- Overnight fermentation develops flavor and enhances softness.
- Use bread flour for optimal gluten development and crumb texture.
- Baking time may vary slightly depending on your oven; watch the bread closely in the final minutes.
- For longer storage, freeze cooled bread wrapped tightly and thaw before use.
- Consume within 3 days to avoid staleness or mold growth.
- Prep Time: 20 minutes
- Cook Time: 35 minutes
- Category: Bread
- Method: Baking
- Cuisine: American
Nutrition
- Serving Size: 1 slice (approximately 56g)
- Calories: 180 kcal
- Sugar: 3 g
- Sodium: 190 mg
- Fat: 5 g
- Saturated Fat: 3 g
- Unsaturated Fat: 2 g
- Trans Fat: 0 g
- Carbohydrates: 30 g
- Fiber: 2 g
- Protein: 5 g
- Cholesterol: 15 mg
Keywords: sourdough bread, sandwich bread, soft sourdough, homemade bread, easy sourdough, bread recipe, natural leavening


